Import
Note
Some features presented on this page will only be available in the private version of GeoSlicer. Learn more by clicking here.
BIAEP Browser
This module is used to access and download samples from Petrobras' BIAEP database. After logging in with their credentials, the user has access to data organized by well. By adding the chosen wells to a selection list, it is possible to observe, for example, all samples that contain a certain type of data, such as: photos, microtomography, tomography, slides, or image profile. The module also features an interactive interface with a preview of the samples, and when deciding which data to import, the user can download them for analysis.
Open Data Rocks
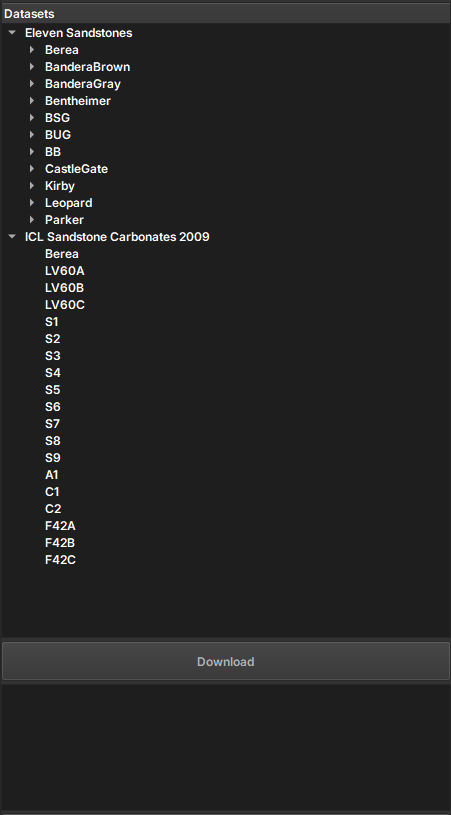
The Open Data Rocks module allows access to digital rock images typically acquired using three-dimensional imaging techniques. The module uses the drd library by Lukas-Mosser to access microtomography data from various geological sources, including the Digital Rocks Portal and Imperial College London. It allows the download and extraction of important datasets, such as Eleven Sandstones and ICL Sandstone Carbonates, facilitating processing and saving in NetCDF format for later analysis.
Panels and their Use
 |
|---|
| Figure 1: Presentation of the Auto Registration module. |
Main Options
-
Datasets: Choose from the images available for download
-
Download: start the download of the selected sample
-
Feedback Panel: Information about the download process is returned through this panel
NetCDF
The NetCDF module provides a set of tools for working with the NetCDF file format (.nc), which is used in GeoSlicer to store multiple volumes, segmentations, and tables in a single self-contained file.
The main advantage of using the NetCDF format is the ability to group related data into a single file. For example, you can save an original image volume and multiple segmentations or analyses (such as porosity tables) together. This keeps all your project data organized and portable, facilitating sharing and archiving.
Additionally, NetCDF is a standard and self-describing data format, widely used in scientific applications. This means that .nc files generated by GeoSlicer can be easily opened and processed by other external tools and libraries, such as xarray and netCDF4 in Python, enabling customized analysis workflows.
Features
The module is divided into three main tabs:
- Import: Allows loading data from a NetCDF (
.nc) or HDF5 (.h5,.hdf5) file into the scene. - Save: Allows saving new images or tables from a project folder back to the original NetCDF file from which they were imported. This operation modifies the existing file.
- Export: Allows exporting one or more items from the scene to a new NetCDF file.
Integration with Other Modules
NetCDF files integrate with other GeoSlicer modules for advanced workflows:
- It is possible to import a NetCDF file using the Micro CT Loader.
- For NetCDF files containing images too large to fit into memory, you can use the Big Image module to view and process them efficiently.
NetCDF Import
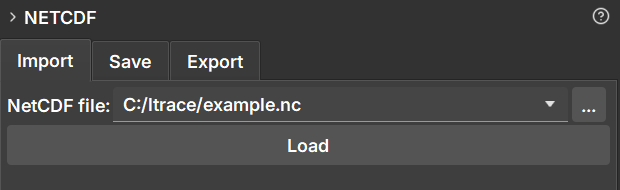
The Import tab is used to load data from NetCDF (.nc) or HDF5 (.h5, .hdf5) files into GeoSlicer.
How to Use
- Navigate to the NetCDF module and select the Import tab.
- Click the file selection button next to "NetCDF file:" to open the file explorer.
- Select the
.nc,.h5, or.hdf5file you want to load. - Click the Load button.
Behavior
When loading a file, GeoSlicer creates a new folder in the data hierarchy with the same name as the file. All volumes, segmentations, and tables contained within the NetCDF file are loaded into this folder.
This project folder is linked to the original file. This linking is essential for the Save functionality, which allows updating the original file with new data generated in GeoSlicer.
NetCDF Export
The Export tab allows you to save one or more scene items (volumes, segmentations, tables) into a new NetCDF (.nc) file. It is the ideal tool to create a new dataset from results generated or modified in GeoSlicer.

How to Use
- Navigate to the NetCDF module and select the Export tab.
- In the data hierarchy tree displayed in the module, select the items you wish to export. You can select individual items (such as volumes or tables) or entire folders to export all their content.
- Choose the destination path and the name of the new file in the Export path field.
- Configure the export options as needed (detailed below).
- Click the Export button.
Export Options
-
Use the same coordinate system for all images:
- When checked, this option ensures that all exported images are spatially aligned. Images are resampled to fit a common coordinate system, defined by the Reference node.
- This is useful for ensuring alignment, but it can increase the file size if images have very different orientations or spacings, due to the need for padding.
- If unchecked, each image is saved with its own coordinate system, which can result in a smaller file.
-
Reference node:
- Enabled only when the option above is checked.
- Select an image (volume) that will serve as a reference for the coordinate system. All other images will be aligned to this one.
-
Use compression:
- When checked, applies compression to the data, which reduces the final file size.
- Compression can make the process of saving and loading the file slightly slower.
Difference between Export and Save
- Export always creates a new
.ncfile. - Save modifies an existing
.ncfile that was previously imported.
Save Data to an Existing NetCDF File
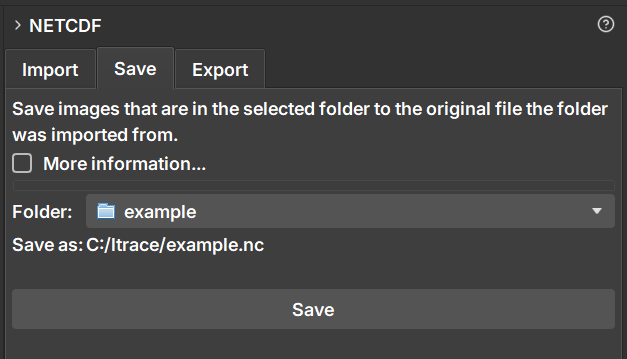
The Save tab offers a way to update a NetCDF file (.nc) that was previously imported into GeoSlicer. It allows you to add new items (such as volumes, segmentations, or tables) from a project folder back to the original file, modifying it directly.
The main motivation for using the Save functionality is to be able to save changes or new data (such as a newly created segmentation) back to the original NetCDF file, preserving all existing attributes, metadata, and coordinate structure. Unlike the "Export" option, which creates an entirely new file, "Save" only appends the new data, ensuring that consistency with the original file is maintained. This is ideal for iterative workflows where you enrich an existing dataset without losing the original context.
How to Use
The Save functionality is designed for a specific workflow:
- First, import a NetCDF file using the Import tab. This will create a project folder in the data hierarchy.
- Work on your project. You can, for example, create a new segmentation for a volume that was in the file or drag a new volume into the project folder.
- Navigate to the NetCDF module and select the Save tab.
- In the Folder field, select the project folder that corresponds to the file you want to update.
- The Save as: field will be automatically populated with the original file path, confirming where the changes will be saved.
- Click the Save button.
Behavior
- The operation modifies the original file. It is recommended to create a backup if you need to preserve the file's previous state.
- Only new items within the project folder that do not yet exist in the
.ncfile will be added. - Items that were already in the file are not overwritten or deleted.
- Newly added images are automatically resampled to align with the coordinate system of the data already existing in the file.
Difference between Save and Export
- Save modifies an existing
.ncfile, preserving its structure and metadata. - Export always creates a new
.ncfile.
3D Surface Loader
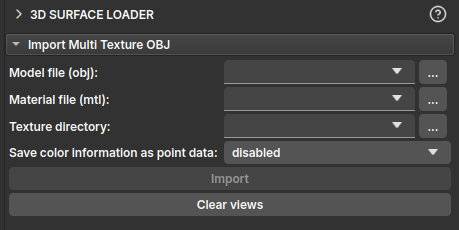
The 3D Surface Loader module is a tool designed to load and visualize textured 3D surface models within the GeoSlicer environment. Its main purpose is to import models in the .obj format that are accompanied by material files (.mtl) and image textures, applying these textures to the model's geometry for a 3D visualization of the rock surface. Typically, such images originate from 3D scanners.
How to Use
The module's interface is straightforward, focused on importing models with multiple textures.
The main options available for importing the 3D model are:
- Model file (obj): Select the 3D model file with the
.objextension that you want to load. - Material file (mtl): Select the corresponding material file, with the
.mtlextension. The module will attempt to automatically populate this field if an.mtlfile with the same name as the.objfile is found in the same directory. - Texture directory: Specify the directory where the texture images (e.g.,
.pngor.jpgfiles referenced by the.mtlfile) are located. The module will also attempt to automatically populate this field based on the model file's path. - Save color information as point data : This option allows saving texture colors as model attributes. This can be useful for subsequent color-based analyses or filters. The options are:
disabled: Does not save color information to points.separate scalars: Saves color channels (Red, Green, Blue) as separate scalar arrays.single vector: Saves color information as a single 3-component vector (RGB).
- Import: After filling in the fields, click this button to load the model and its textures into the scene.
- Clear views: Disables the slices normally used in the slicer, to view only the 3D model.